Important: Extreme temperatures will result in poor adhesive performance. Apply only if the air and surface temperature is
between 50° - 104°F (10° - 40°C). Avoid touching adhesive after removing liner, as this will weaken the bond strength.
Additional items needed for installation: Soap and Water Solution • Clean Dry Towel • Scissors • Measuring tape
| Trailer Ramp Gap Cover with Wood Floors | ||||||||
|---|---|---|---|---|---|---|---|---|
Open ramp door to ground level. Remove existing sponge rubber seal along the horizontal bottom of gap. Clean thoroughly, with soap and water, the open-door gap area. This is the area between the wood floor on the trailer side and the wood floor on the ramp side. Rinse thoroughly and dry with a towel. |
||||||||
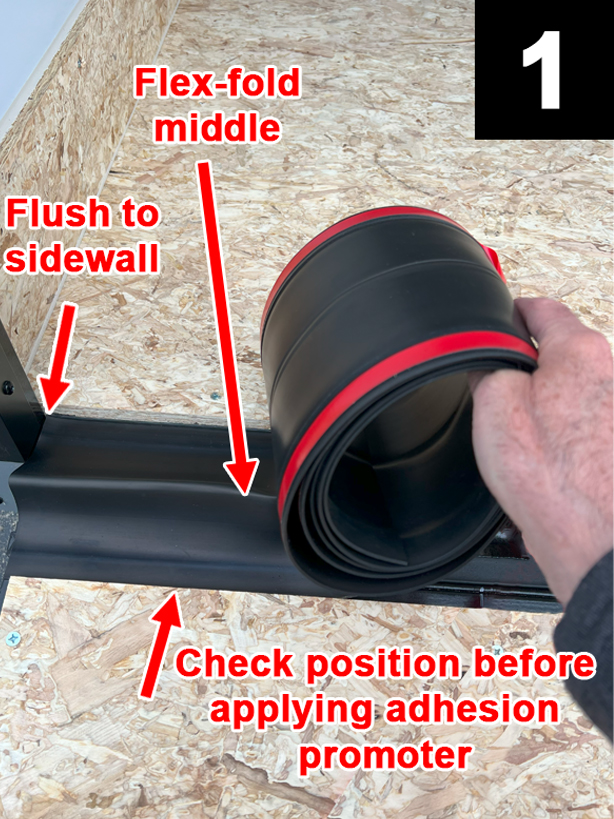 |
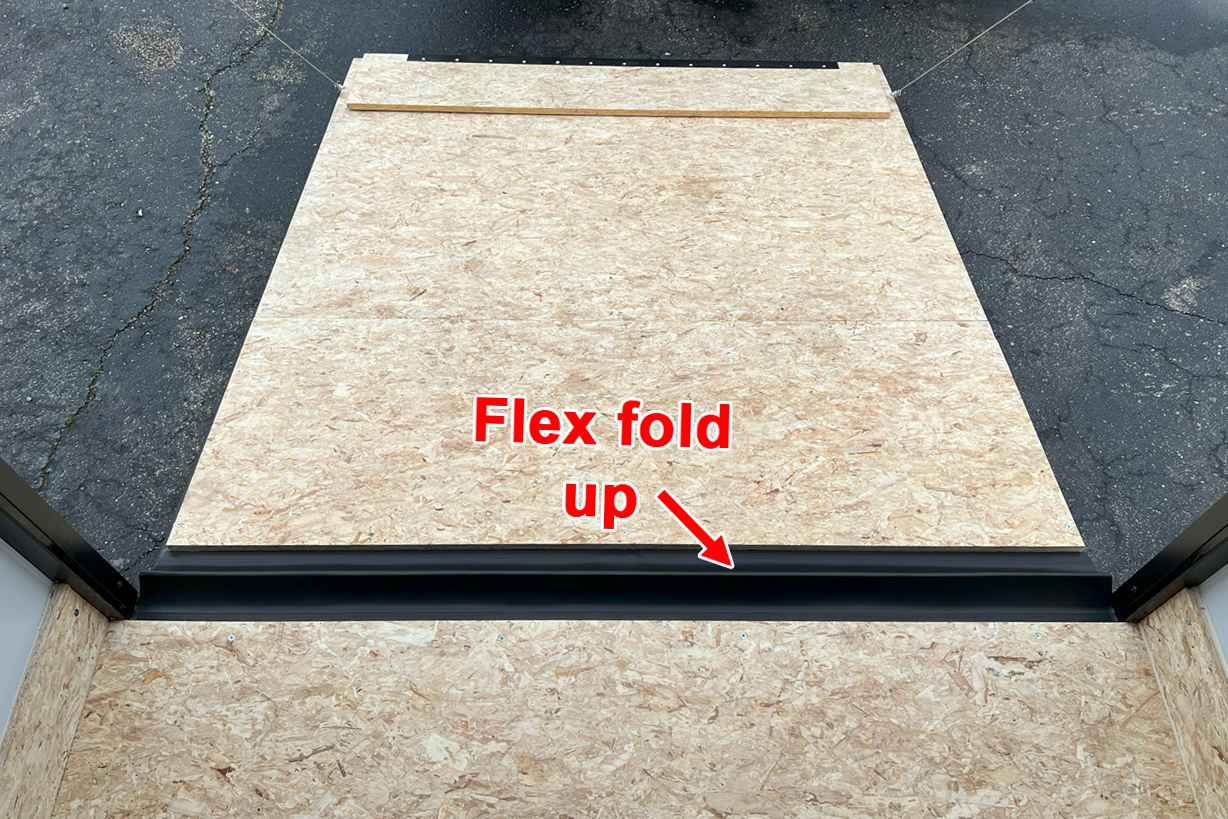
As shown in FIG 1, one edge of seal adheres to the gap opening on the trailer side and the other edge of seal adheres to the gap opening on the ramp door side. Flush one end of seal to one of the vertical sidewalls and lay out entire seal, as flat as possible, across the open-door gap. If the flex-fold middle wants to go up or down, make sure that it’s up for the remainder of installation. Excess seal will be to one side. The seal and adhesive can be positioned over uneven surfaces. |
|||||||
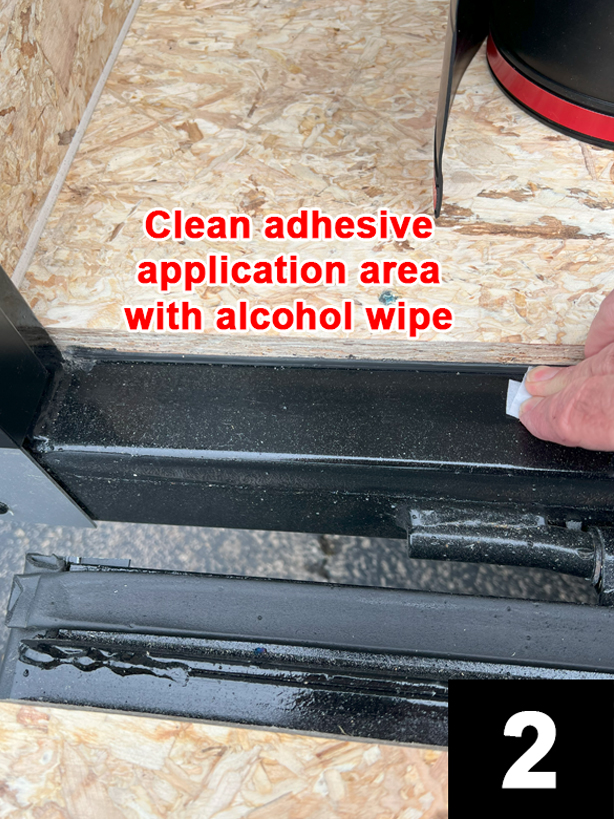 |
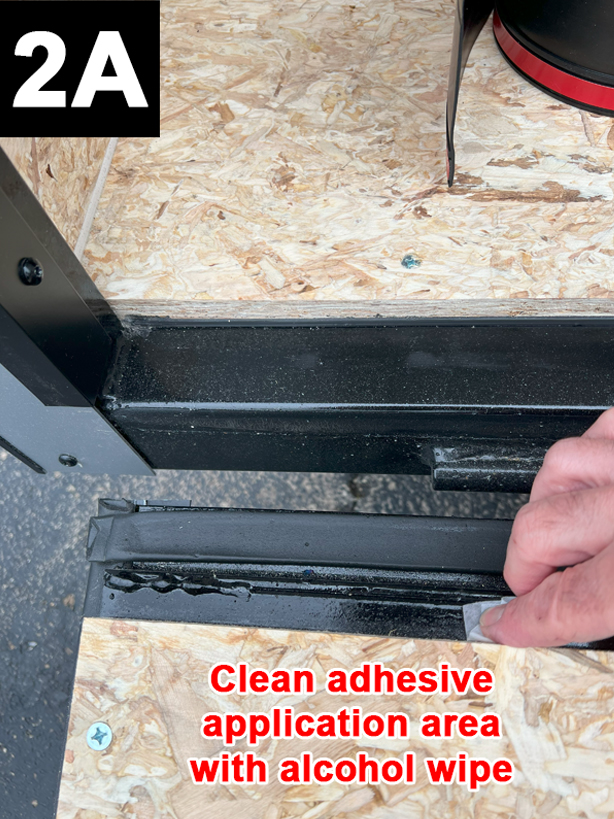
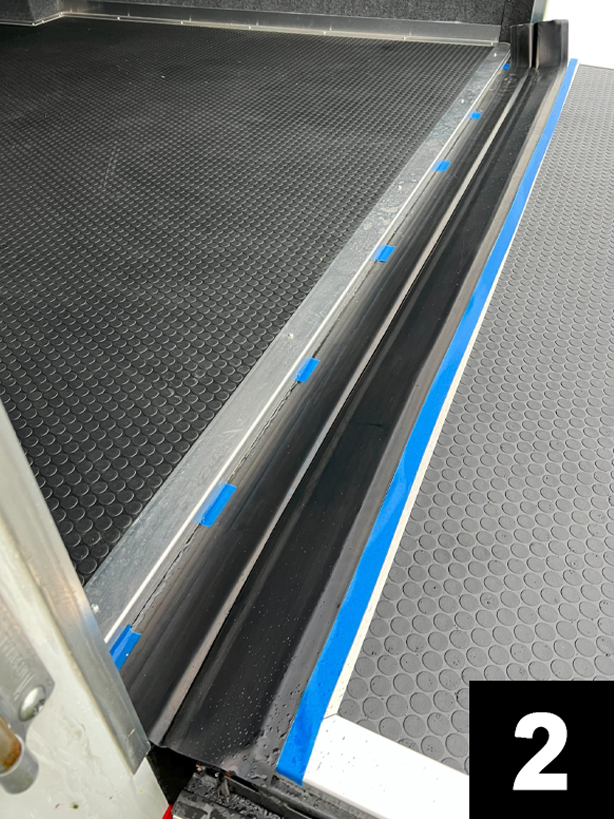
Apply a straight line or cut pieces of marking tape (not shown) along the edge of seal that will be adhered to the trailer side. Do the same along the edge of seal that will be adhered to the ramp door side. For images of this step see install instructions for Finished Floors FIG 2A. Place aside the entire seal. Use enclosed alcohol pads to further clean both adhesive application areas (FIG 2 & 2A). Let dry 1 minute. |
 |
||||||
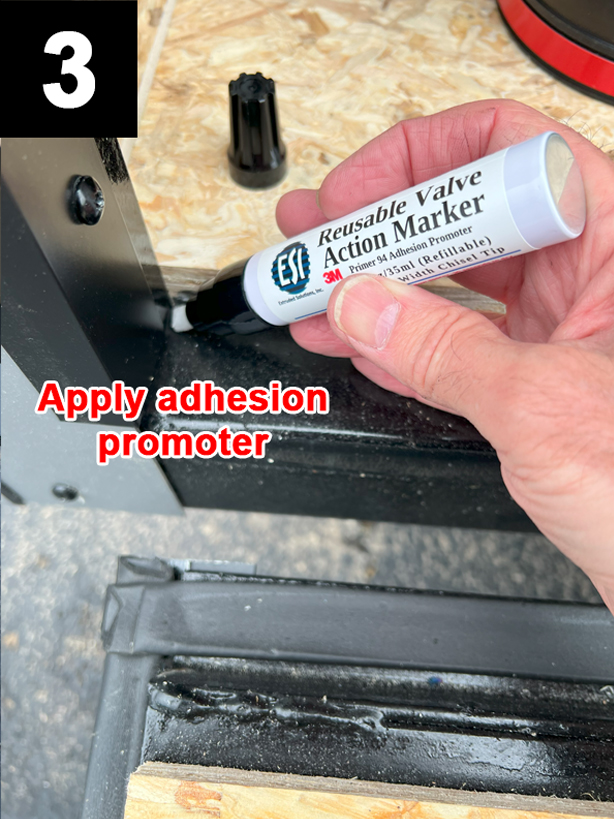 |
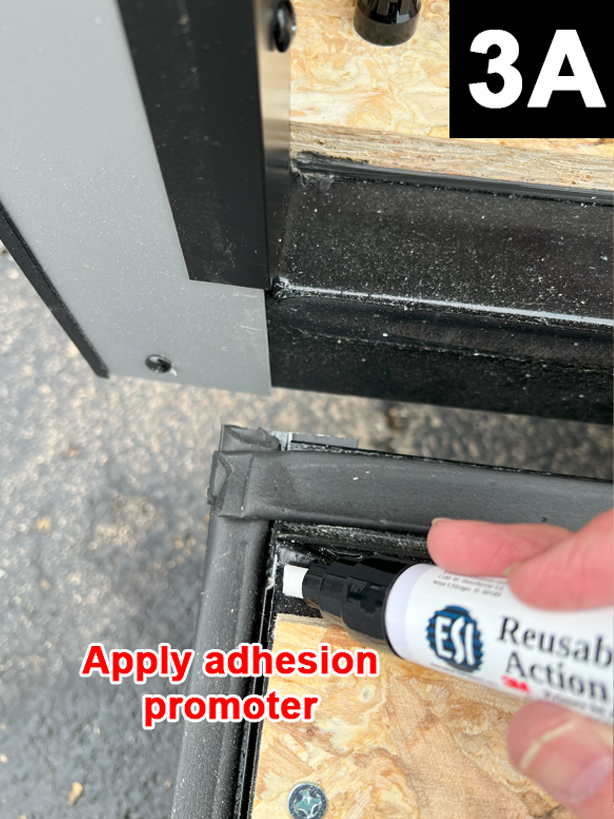
Use enclosed adhesion promoter and apply a thin layer, approximately 3/4” (1.9cm) wide, along the inside of both marking tapes (FIG 3 & 3A, marking tape not shown). The adhesion promoter will give the adhesive excellent bonding strength. Let dry for 2 minutes. Apply seal within the next 2 hours. |
 |
||||||
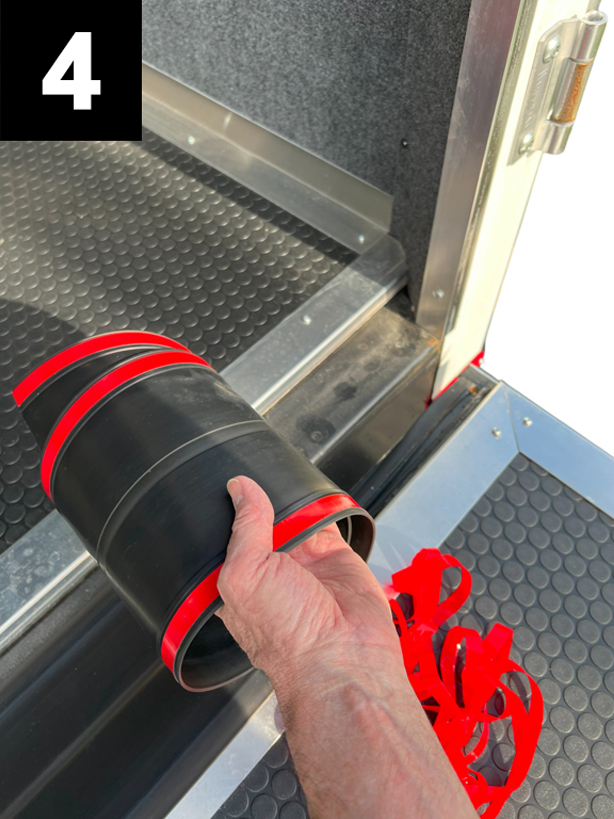
Roll up seal to one side. Remove 1 - 2ft (30 - 60cm) sections of both red adhesive liners. Kneel and pick up roll of seal with one hand and hold up off the surface. Use the other hand and position one end of seal to one vertical sidewall (FIG 1) and between the edges of marking tape lines (marking tape not shown). Keeping roll of seal off the surface, slowly unroll with one hand while applying moderate pressure to the top of seal, along both adhesive strips, with the other hand. Keep seal taunt, but do not stretch and slowly adhere while following the edges of marking tape lines (not shown) and conforming to all contours. Do not reposition seal once adhesive has contacted the surface (this will weaken the bond strength of the adhesive and void the warranty). Stop approximately 12” (30cm) from the other side and leave approximately 12” (30cm) of both red adhesive liners intact. This will make it easier to determine the location of the trimming line. |
||||||||
 |
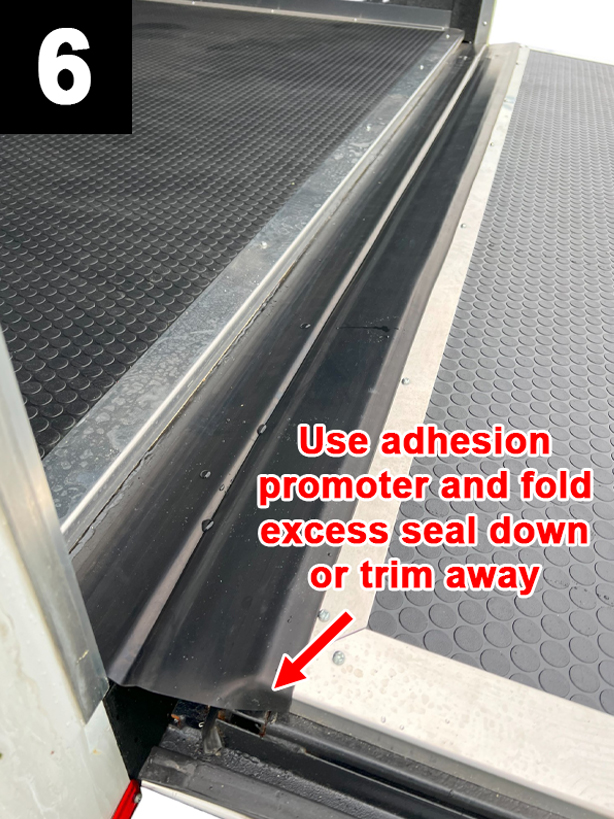
To determine the trimming line press seal into side and find the corner edge. Apply a straight line using marking tape or a pen (FIG 4), starting from the corner edge of trailer floor to ramp door. Lift and trim with a scissors (FIG 4A). Completely remove red adhesive liners and continue to adhere. | 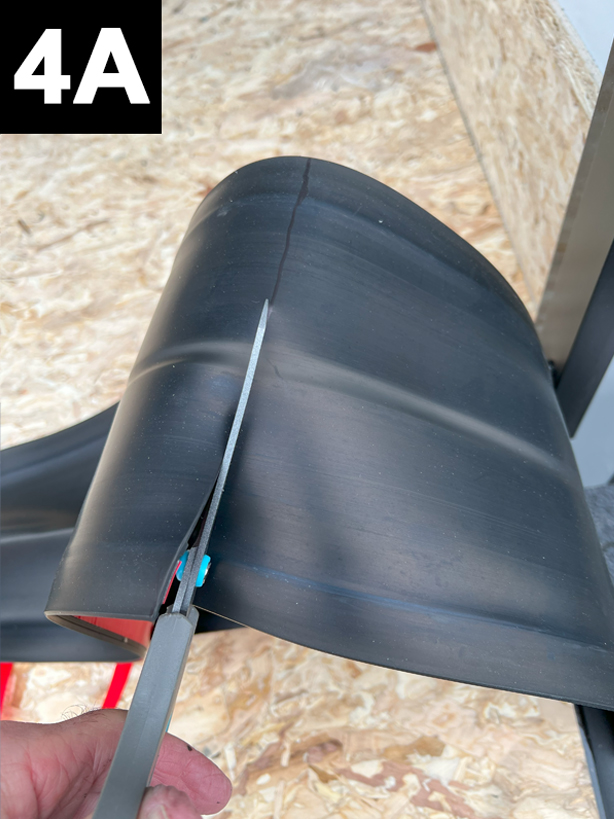 |
||||||
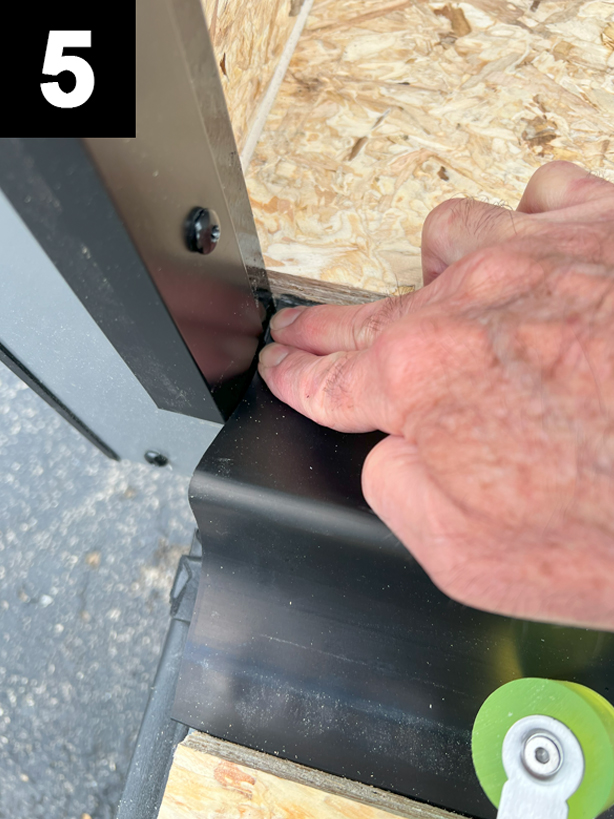 |
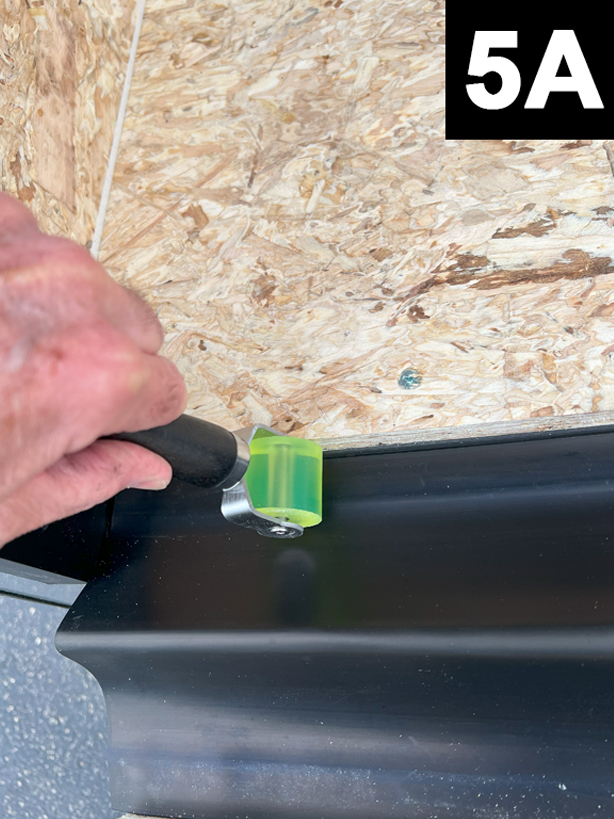
After adhering, use your hands (especially in the corners and along any contours) and enclosed hand roller. Apply very firm pressure (25lbs) to the top of seal, along both adhesive strips (FIG 5 & 5A). Do not close ramp door for a minimum of 90 minutes. NOTE: Cut a notch in ROK BLOCK, as needed, to allow for any vertical supports. |
 |
||||||
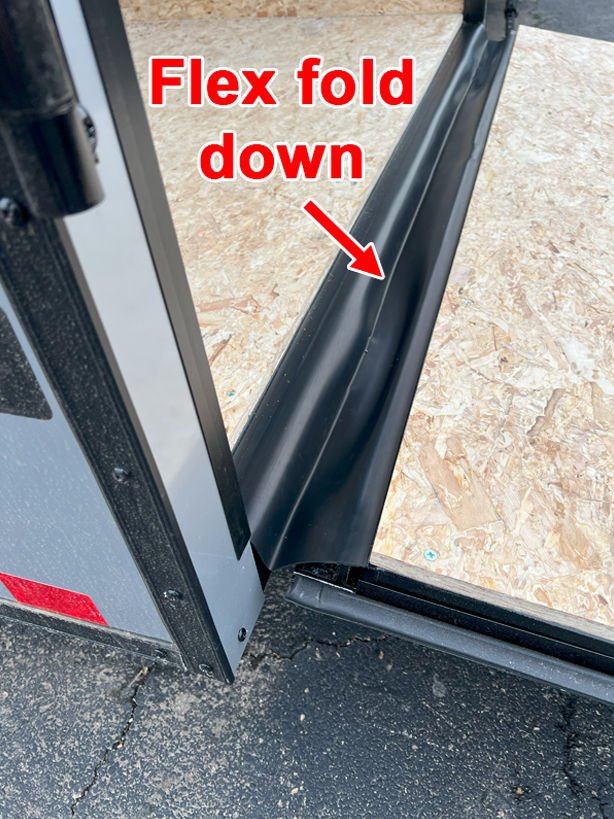 |
When closing ramp door, the flex-fold middle can fold up or down. |
|||||||
 |
||||||||
|
||||||||
 ©2008 Extruded Solutions, Inc. ROK BLOCK® is a registered trademark of Extruded Solutions, Inc. West Chicago, IL. Patent No. US D1,026,791 S Updated: May 2024